How-to
How to Use Benchmark Email: Step-by-Step Guide to Creating and Automating Email Campaigns
Deals Stacks

How to Use Benchmark Email: Step-by-Step Guide to Creating and Automating Email Campaigns
Email marketing becomes much easier when your contacts, campaigns, automation, and reports are managed from one place.
Benchmark Email provides tools that help businesses create professional emails, organize subscribers, segment audiences, automate follow-ups, schedule campaigns, and measure results.
Whether you’re creating your first newsletter or building a more advanced automated campaign, the process can be broken into a few simple steps.
In this guide, we’ll walk through how to use Benchmark Email to create and automate an email campaign from start to finish.
Step 1: Set Up Your Benchmark Email Account
Start by logging into your Benchmark Email account and completing your organization settings.
Add important details such as:
Organization name
Website domain
Business address
Sending email address
Reply-to address
Time zone
Benchmark requires a physical address in email communications, and it recommends using a business-domain email address rather than a personal email address for sending campaigns. You should also authenticate your sending domain to help establish a trustworthy sending identity.
Taking care of these settings before creating campaigns can prevent problems later.
Step 2: Import Your Contacts
Next, add your subscribers to Benchmark Email.
Go to the Contacts area and create or select the list where you want to store your contacts.
You can organize subscribers into lists such as:
Newsletter Subscribers
Customers
Leads
New Subscribers
VIP Customers
Make sure your contacts have permission to receive your marketing emails.
A clean, permission-based list is important for both engagement and deliverability.
Step 3: Organize Your Contacts With Tags and Fields
After importing your contacts, organize the information you have about them.
You can use contact fields and tags to categorize subscribers.
For example:
Customer
Prospect
Newsletter
VIP
Event Attendee
The more useful information you have about your audience, the easier it becomes to create targeted campaigns.
Step 4: Create a Targeted Segment
You don’t always need to send the same email to your entire contact list.
Benchmark Email allows you to create segments based on information stored in your contact fields. You can create a segment by selecting a contact list, choosing criteria, and saving the resulting audience.
For example, you could create a segment for:
Customers in Delhi
or
Subscribers interested in AI
or
People who joined after January 2026
You can then send a campaign specifically to that group.
Step 5: Create a New Email Campaign
Now you’re ready to create your campaign.
From the Benchmark dashboard:
Emails → Emails → Create New Email
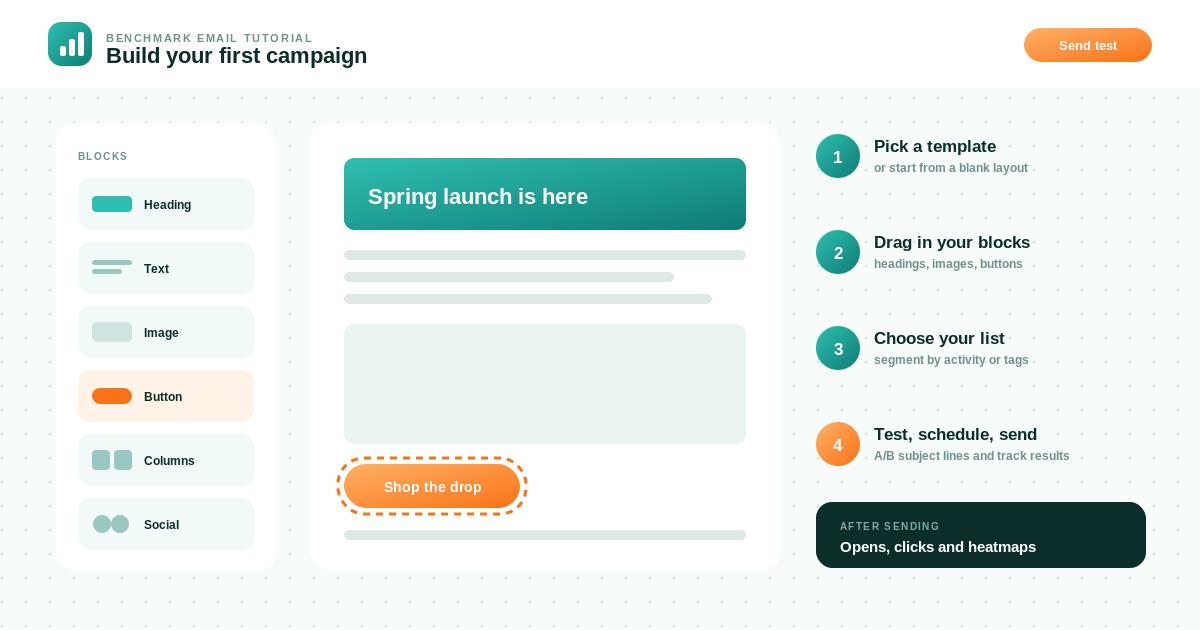
Select Regular Email, then choose the Drag & Drop Editor.
Benchmark’s current documentation confirms that the editor allows you to start with a blank layout, use a pre-designed template, or reuse a previous email.
Give your email an internal name so you can easily identify it later.
Your contacts will not see this internal campaign name.
Step 6: Choose an Email Template
If you’re new to email design, using a template can save considerable time.
You can choose a design based on your campaign type.
For example:
Newsletter
Use multiple content sections for articles, updates, and resources.
Promotional Email
Use a strong headline, product image, offer, and CTA.
Event Email
Highlight the event details and registration button.
Welcome Email
Keep the design simple and introduce your brand.
Benchmark also lets you start with a blank layout if you want complete control over the design.
Step 7: Design Your Email
Once you’ve selected your layout, customize the email using the drag-and-drop editor.
You can add and rearrange:
Text
Images
Buttons
Headings
Social links
Content sections
Columns
You can also adjust global styles such as fonts and background colors to keep your campaign consistent with your brand.
Try to keep the design clean.
Your reader should quickly understand:
What is this email about?
Why is it useful?
What should I do next?
Step 8: Write Your Email Content
A simple campaign structure works well for most businesses.
Headline
Tell the reader what the email is about.
Introduction
Briefly explain why you’re sending the message.
Main Content
Provide the information, offer, or update.
Call to Action
Tell the reader what to do next.
For example:
Discover Our New Marketing Guide
We’ve created a practical guide to help you improve your email campaigns.
Read the Guide
Keep your content focused and avoid unnecessary paragraphs.
Step 9: Add Personalization
Personalization can make an email feel more relevant.
You might personalize a message using information such as:
First name
Company
Location
Customer type
Other custom contact fields
For example:
Hi Nisha,
can feel more personal than:
Hi there,
However, personalization should support useful content rather than become a substitute for it.
Step 10: Choose Your Recipients
After designing the email, decide who should receive it.
In the email checklist, open the To section and select your contact list or segment.
Benchmark also allows you to exclude a list or segment from the campaign.
For example:
Send to: Newsletter Subscribers
Exclude: Existing Customers
This can help prevent irrelevant emails from reaching certain subscribers.
Step 11: Add Your Sender Information
Open the From section and choose the sender name and email address.
Use a sender name that your audience recognizes.
For example:
Deals Stacks
or
Deals Stacks Team
For the email address, a business-domain address is generally preferable to a personal or generic address. Benchmark recommends verifying sender addresses before using them.
Step 12: Write Your Subject Line
Your subject line should clearly communicate why someone should open the email.
Examples:
5 Email Marketing Tips for 2026
Your Weekly Marketing Update
New Resources for Your Business
How to Improve Your Email Campaigns
Benchmark also provides subject-line suggestions and supports A/B testing for subject lines in its email workflow.
Avoid misleading or overly promotional subject lines.
The email should deliver what the subject promises.
Step 13: Add Preview Text
Preview text appears alongside or underneath the subject line in many email inboxes.
Use it to provide additional context.
For example:
Subject:
5 Ways to Improve Your Email Marketing
Preview:
Simple strategies you can start using today.
This gives subscribers another reason to open the email.
Step 14: Add Link Tracking
Benchmark’s email checklist includes Link Tracking & Sharing options.
Depending on your setup, you can enable tracking and connect supported analytics or sharing options.
Tracking can help you understand which links people interact with after receiving your campaign.
This information becomes useful when improving future campaigns.
Step 15: Send a Test Email
Before sending your campaign to your complete audience, send yourself a test.
Benchmark’s Test Email feature lets you send a test version to up to five email addresses at once.
Check:
Subject line
Spelling
Images
Links
Buttons
Personalization
Mobile appearance
Spacing
Footer information
Open the test on both desktop and mobile if possible.
A few minutes of testing can prevent embarrassing mistakes.
Step 16: Complete the Email Checklist
Before sending, review each section of the campaign.
Benchmark’s current email workflow includes:
Design
↓
To
↓
From
↓
Subject
↓
Link Tracking & Sharing
↓
Send Email
The send or schedule option becomes available after the required sections have been completed.
Think of this as your final quality-control step.
Step 17: Send or Schedule the Campaign
When everything is ready, you have two main choices.
Send Immediately
Use this when the campaign needs to go out now.
Schedule
Use this when you want to send the campaign at a specific date and time.
Benchmark allows you to select the date, time, and time zone when scheduling a campaign.
Scheduling is useful for newsletters, product launches, seasonal promotions, and recurring campaigns.
How to Automate Email Campaigns With Benchmark Email
Creating one campaign is useful, but automation can make your email marketing much more efficient.
Instead of manually sending every follow-up email, you can create workflows that respond to subscriber activity.
Step 18: Create a Welcome Automation
A welcome sequence is one of the simplest automations to create.
For example:
New Subscriber
↓
Welcome Email
↓
Wait
↓
Helpful Resource
↓
Wait
↓
Product or Service Introduction
This sequence can run automatically after a subscriber joins your list.
Benchmark’s automation tools support workflows based on subscriber behavior and contact-list activity.
Step 19: Choose Automation Lite or Automation Pro
Benchmark currently provides different automation options, including Automation Lite and Automation Pro. Automation Pro is designed for more advanced workflows.
For a basic campaign, a simple automation may be enough.
For more complicated customer journeys, Automation Pro provides a visual workflow environment where you can build multiple steps and conditions.
Step 20: Choose Your Automation Trigger
Every automation needs a starting point.
For example, the trigger could be:
Contact joins a list
or
Contact joins a segment
The trigger tells Benchmark when the automation should begin.
For example:
New Subscriber → Start Welcome Sequence
Step 21: Add Actions to the Workflow
After the trigger, decide what should happen.
A simple workflow might be:
Subscriber Joins List
↓
Send Welcome Email
↓
Wait 2 Days
↓
Send Educational Email
↓
Wait 3 Days
↓
Send Product Email
This allows you to build a complete customer journey instead of sending isolated campaigns.
Step 22: Add Conditions and Segments
You can make an automation more intelligent by using conditions and audience segments.
For example:
Subscriber Joins List
↓
Send Welcome Email
↓
Check Segment
↙️ ↘️
Interested in AI Interested in Marketing
↓
Different follow-up content
Benchmark supports segments in automation workflows, including segment-based triggers and conditions in Automation Pro.
This helps create more personalized journeys.
Step 23: Test Your Automation
Before activating an important automation, test the workflow.
Check:
Trigger
Email content
Waiting periods
Conditions
Links
Subscriber paths
Final CTA
Make sure the subscriber doesn’t accidentally receive the wrong message or multiple versions of the same email.
Step 24: Activate the Automation
Once you’ve tested everything, activate your workflow.
From that point, new contacts who meet your trigger conditions can enter the automation automatically.
You no longer need to manually send every email in the sequence.
How to Track Your Campaign Performance
Step 25: Review Your Reports
After your campaign has been sent, review the results.
Pay attention to:
Opens
Clicks
Bounces
Unsubscribes
Engagement
Subscriber activity
Benchmark provides reporting tools for reviewing campaign performance, while its Contact Activity Feed helps you see subscriber interactions.
Step 26: Learn From the Results
Your campaign data should influence your next campaign.
For example:
High Opens + Low Clicks
Your subject line may be working, but your content or CTA may need improvement.
Low Opens
Consider testing a different subject line, audience, or sending time.
High Clicks
Look at the content and CTA that generated the engagement and consider creating similar campaigns.
High Unsubscribes
Your audience may be receiving too many emails or content that isn’t relevant enough.
The goal is to continuously improve.
A Simple Benchmark Email Automation Strategy
For beginners, this workflow is a good starting point:
Step 1: Collect subscribers
↓
Step 2: Send welcome email
↓
Step 3: Wait
↓
Step 4: Send useful educational content
↓
Step 5: Segment subscribers
↓
Step 6: Send relevant content
↓
Step 7: Introduce your product or service
↓
Step 8: Track engagement
↓
Step 9: Improve the workflow
This turns a simple contact list into an automated email marketing system.
Best Practices for Benchmark Email
Keep Your Contact List Clean
Remove invalid addresses and manage inactive contacts appropriately.
Segment Your Audience
Don’t send every message to every subscriber.
Keep Emails Focused
One campaign should generally have one main purpose.
Use Clear CTAs
Make the desired action obvious.
Test Before Sending
Always review your campaign before sending it to your complete list.
Use Automation Carefully
Automation should make communication more useful, not simply increase the number of emails you send.
Review Your Analytics
Use campaign results to improve your next email.
Maintain Consistency
Choose a realistic publishing schedule and stick to it.
Final Thoughts
Benchmark Email provides a straightforward workflow for creating and automating email campaigns.
The basic process is:
Set Up → Add Contacts → Segment → Create → Personalize → Test → Send → Analyze
Then you can build more advanced workflows:
Trigger → Email → Wait → Condition → Follow-Up → Analyze
The platform’s drag-and-drop editor makes it possible to create campaigns without advanced coding knowledge, while segmentation and automation allow you to build more personalized subscriber journeys.
The key is to start simple. Create one useful campaign, test it, study the results, and then gradually introduce automation.
When used this way, Benchmark Email can help turn email marketing from a series of manual tasks into a repeatable system for communicating with and nurturing your audience.