Tutorial
How to Use Benchmark Email: A Complete Step-by-Step Tutorial for Email Marketing
Deals Stacks
How to Use Benchmark Email: A Complete Step-by-Step Tutorial for Email Marketing
If you’re new to email marketing, getting started can feel complicated. You need to organize your contacts, create an attractive email, choose the right audience, schedule the campaign, and then understand whether people actually engaged with it.
Benchmark Email brings these tasks together in one platform.
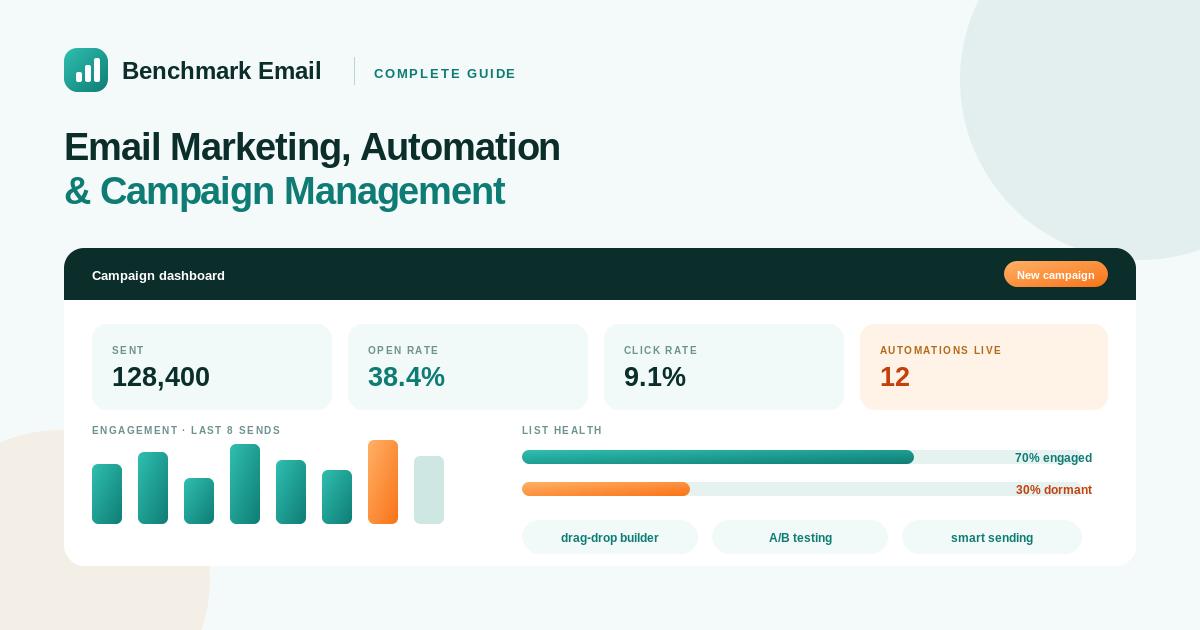
Its current workflow is built around creating emails, managing contacts, using forms to grow your list, sending campaigns, and tracking results. Benchmark also provides segmentation, automation, reporting, and AI-assisted content tools.
This tutorial will walk you through the process step by step, from setting up your account to analyzing your first campaign.
Step 1: Create Your Benchmark Email Account
Start by creating your Benchmark Email account and completing the initial account setup.
Before sending campaigns, make sure your organization information is complete. Benchmark requires sender information such as your organization details and physical address for email communications. You should also check your account’s time-zone settings so scheduled campaigns use the correct time.
Basic setup checklist:
Add your organization name
Add your website/domain
Add your business address
Verify your email address
Configure your sending information
Check your time zone
Review your account settings
Taking a few minutes to complete this information can prevent problems later when you try to send your first campaign.
Step 2: Import Your Contacts
Your subscribers are the foundation of your email marketing campaign.
From the Benchmark dashboard, go to the Contacts area and create or select the list you want to use.
You can then import your existing contacts and organize them into appropriate lists.
For example, you could create:
Newsletter Subscribers
Existing Customers
New Leads
VIP Customers
Event Registrants
Benchmark’s contact-management tools support lists, tags, custom fields, filtering, engagement tracking, and segmentation.
Important:
Only email people who have given you appropriate permission to receive your marketing communications.
A clean, permission-based list is much more valuable than a large list of people who don’t want your emails.
Step 3: Organize Your Contacts
After importing contacts, organize them before sending your first campaign.
You can use tags, lists, custom fields, and segments to organize subscribers.
For example:
Tag: Customer
Tag: Lead
Tag: Newsletter
Tag: VIP
You can also use subscriber information to create more specific groups.
This becomes useful when you don’t want to send the same message to your entire audience.
Step 4: Create a Subscriber Segment
Segmentation allows you to create a targeted group from your existing contacts.
For example, you could create a segment containing subscribers from a particular location or people who meet a specific condition in your contact data.
In Benchmark, you can go to Contacts → Segments → Create New Segment, choose your contact list, name the segment, and then add criteria.
A simple strategy could look like this:
All Contacts
↓
Customers
↓
Repeat Customers
↓
VIP Customers
You can then create different campaigns for each audience.
Step 5: Create Your First Email
Now it’s time to create your campaign.
From the Benchmark dashboard, go to Emails and select the option to create a new email.
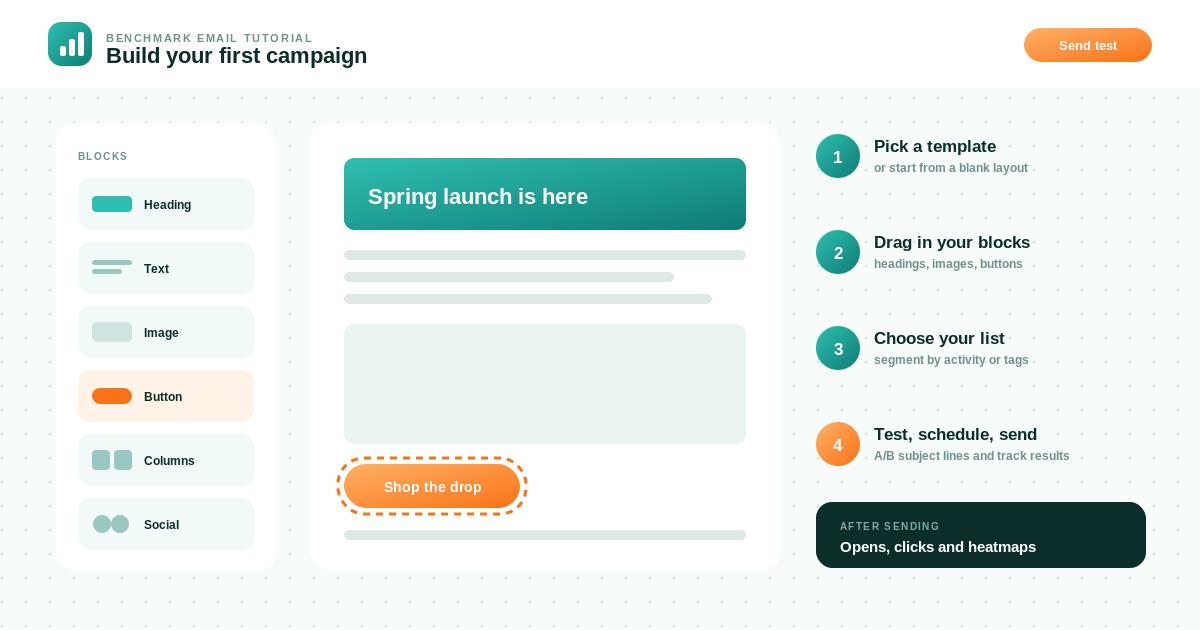
Benchmark’s current Drag & Drop Editor lets you start with a pre-designed template, create an email from scratch, or reuse a previous email.
Choose:
Create New Email → Regular Email → Drag & Drop Editor
Then give your email an internal name.
This name is for your organization and isn’t the same as the subject line subscribers will see.
Step 6: Choose a Template
If you’re new to email design, start with a template.
Choose a layout that matches your campaign.
For example:
Newsletter
Use a clean layout with multiple content sections.
Product Promotion
Use a strong image, short description, and clear CTA.
Event Invitation
Highlight the event details and registration button.
Company Update
Use a simple text-and-image layout.
Templates can save time while giving your emails a professional structure.
Step 7: Customize Your Email Design
Once you’ve selected a template, customize it using the Drag & Drop Editor.
You can add or rearrange sections and content blocks such as:
Text
Images
Buttons
Headings
Social links
Multiple-column layouts
Benchmark’s current editor also supports global styles so you can maintain consistent fonts, colors, and other design elements across your email.
Keep the design simple.
Your readers should immediately understand:
What is this email about?
Why should I care?
What should I do next?
Step 8: Add Your Content
Now write the actual message.
A simple promotional email can follow this structure:
Subject
A clear reason to open the email.
Introduction
Briefly explain why you’re contacting the subscriber.
Main Content
Provide the information, offer, or update.
Call to Action
Tell the reader what to do next.
For example:
Discover Our New Collection
We’ve just launched a new range of products designed for everyday use.
Explore the Collection
Keep your copy concise and focused.
Avoid filling the email with unnecessary information.
Step 9: Use AI to Improve Your Copy
Benchmark provides AI-assisted content features that can help improve email copy.
Its current email tools include Smart Text assistance for areas such as spelling, grammar, tone, and length.
You can use AI assistance when you have a rough draft but want to make it clearer.
For example:
Original:
We have many new products available and you can check them out now.
Improved:
Discover our latest products, designed to make your everyday tasks easier.
The goal should be to improve your message, not replace your own brand voice.
Step 10: Add Images and Buttons
Visual elements can make your email easier to understand.
Add images that support the message rather than using visuals simply to fill space.
You can also add buttons for important actions.
Examples include:
Shop Now
Read More
Register Today
Download Guide
Book a Demo
Learn More
Make your main CTA easy to identify.
Step 11: Personalize Your Email
Personalization allows you to use subscriber information within your email.
For example:
Hi [First Name],
can feel more personal than a generic greeting.
You can use available contact fields to personalize appropriate parts of your campaign.
Don’t overuse personalization, though.
The goal is to make the email more relevant, not make every sentence look automated.
Step 12: Select Your Audience
Once your email design is ready, decide who should receive it.
In the email checklist, use the To section to select the contact list or segment.
Benchmark also allows you to exclude specific lists or segments when necessary.
For example:
Send to: Newsletter Subscribers
Exclude: Existing Customers
This can prevent people from receiving irrelevant campaigns.
Step 13: Add the Sender Information
Make sure your sender name and email address are recognizable.
Instead of using an unfamiliar address, use a sender identity that your subscribers will recognize.
For example:
Deals Stacks
or
Nisha from Deals Stacks
A familiar sender name can make your emails feel more trustworthy and easier to identify in the inbox.
Step 14: Write a Strong Subject Line
Your subject line is one of the most important parts of your email.
Keep it clear and relevant.
Examples:
5 Ways to Improve Your Email Marketing
Your Weekly Marketing Tips Are Here
New Tools You Should Know About
Your Exclusive Offer Ends Friday
Avoid misleading subject lines.
The content of the email should match what the subject promises.
Step 15: Test Your Email
Before sending your campaign to your entire list, send a test email to yourself.
Benchmark’s current editor includes a test-email option so you can check how the campaign appears in your inbox before scheduling or sending it.
Check:
Subject line
Images
Spelling
Links
Buttons
Mobile layout
Personalization
Spacing
Overall appearance
This simple step can catch mistakes before they reach your subscribers.
Step 16: Complete the Email Checklist
Benchmark organizes campaign creation around an email checklist.
Depending on the campaign, you need to review areas such as:
Design
↓
Recipients
↓
Sender
↓
Subject
↓
Tracking
↓
Send
The platform requires the necessary sections to be completed before sending or scheduling the campaign.
Think of this as your final quality check.
Step 17: Schedule or Send Your Email
Once everything looks correct, you can either send the email immediately or schedule it for later.
Benchmark provides both options.
Send Immediately
Use this when you want the campaign to go out now.
Schedule
Use this when you want the email to be delivered at a specific date and time.
When scheduling, select the appropriate:
Date
Time
Time zone
Benchmark’s current editor documentation confirms that campaigns can be scheduled after the required checklist sections have been completed.
Step 18: Create an Automated Welcome Email
After launching your first campaign, you can start automating repetitive communication.
A simple welcome sequence could be:
New Subscriber
↓
Welcome Email
↓
Useful Resource
↓
Educational Email
↓
Product or Service Introduction
Automation allows you to create these workflows once and let them run automatically.
Benchmark currently provides Automation Lite and Automation Pro options, with Automation Pro offering a visual canvas for creating more advanced journeys.
Step 19: Build an Automation Workflow
For more advanced automation, open Automations → Automation Pro and create a new automation.
You can start from scratch or use a template.
Automation Pro uses different elements to build a customer journey:
Triggers
Determine when someone enters the workflow.
Actions
Determine what the system should do.
Conditions
Determine which path a subscriber should follow.
For example:
Contact Joins List
↓
Send Welcome Email
↓
Wait
↓
Send Educational Email
↓
Check Engagement
↓
Send Follow-Up
Benchmark’s Automation Pro canvas supports triggers based on lists and segments, along with actions such as sending emails, adding contacts to lists, removing contacts, updating contact details, and applying other workflow actions.
Step 20: Use Segmentation in Automation
You can also use segments to create more targeted automated journeys.
For example:
New Subscriber
↓
Interested in AI
→ AI-focused email sequence
Interested in Marketing
→ Marketing-focused email sequence
This allows your subscribers to receive content that matches their interests.
Benchmark supports segments within its automation workflows.
Step 21: Track Your Campaign Results
After sending your campaign, don’t stop there.
Go to your reporting area and review how your email performed.
Useful metrics include:
Opens
Clicks
Bounces
Unsubscribes
Engagement
Subscriber activity
Benchmark also provides a real-time Contact Activity Feed, allowing marketers to see engagement information as subscribers interact with campaigns.
Step 22: Analyze What Worked
Suppose you send three campaigns.
Campaign A
High opens, low clicks.
This could mean the subject line attracted attention but the content or CTA needs improvement.
Campaign B
Average opens, high clicks.
The content may be highly relevant to the people who opened it.
Campaign C
Low opens and low clicks.
You may need to review the subject line, audience, timing, or content.
Use these observations to improve future campaigns.
Step 23: Keep Improving Your Contact List
Over time, your contact database will change.
Some people will become highly engaged.
Others may stop interacting with your emails.
Benchmark provides contact-management and suppression tools that help marketers manage unsubscribed or inactive contacts and maintain cleaner lists.
A clean database can make your campaigns easier to manage and your reporting more meaningful.
A Simple Benchmark Email Workflow
Once you’ve learned the basics, your regular process can be very simple:
1. Add Contacts
↓
2. Organize & Segment
↓
3. Create Email
↓
4. Personalize
↓
5. Test
↓
6. Send or Schedule
↓
7. Track Results
↓
8. Improve
↓
9. Automate Repetitive Campaigns
This creates a repeatable email marketing system.
Best Practices for Benchmark Email
Keep Your Emails Simple
Don’t overload your campaigns with too many messages or buttons.
Segment Your Audience
Send relevant content to the right people.
Test Before Sending
Always check your email before sending it to your complete list.
Use Clear CTAs
Tell readers exactly what action you want them to take.
Track Performance
Don’t judge a campaign only by the number of emails sent.
Clean Your List
Manage inactive, bounced, and unsubscribed contacts appropriately.
Be Consistent
A consistent publishing schedule can help build a stronger relationship with your subscribers.
Final Thoughts
Benchmark Email provides a straightforward workflow for creating and managing email campaigns.
You can start with a simple process:
Import contacts → Create an email → Choose your audience → Test → Send → Track
As your email marketing becomes more advanced, you can add:
Segmentation → Personalization → Automation → Reporting → Optimization
The most important thing is to start with useful content and a clean subscriber list. The software can make the process easier, but the quality and relevance of your communication will ultimately determine how valuable your email program becomes.
For beginners, Benchmark’s visual editor and straightforward workflow make it possible to launch a campaign without advanced coding skills. For more experienced marketers, features such as segmentation, automation, integrations, and reporting provide additional control as the program grows.