How-to
How to Use Dext for Automated Receipt and Invoice Processing
Deals Stacks
How to Use Dext for Automated Receipt and Invoice Processing
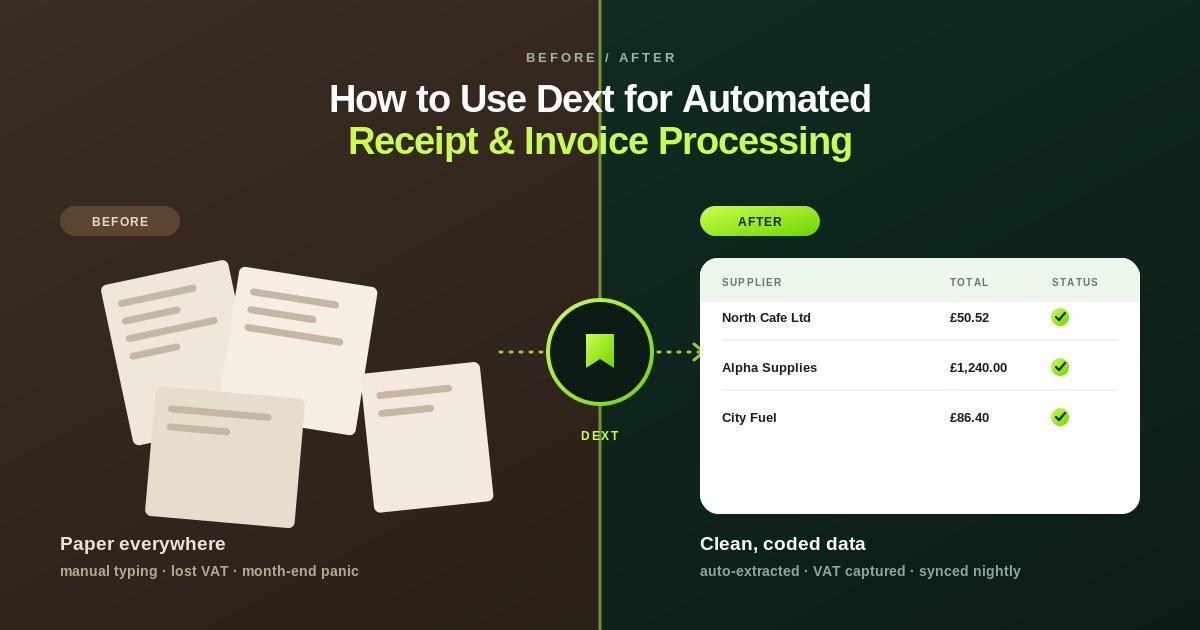
Managing receipts and invoices manually can take a lot of time, especially when a business processes hundreds of financial documents every month. Dext helps simplify this process by capturing documents, extracting financial information, and preparing transactions for connected accounting software.
Whether you’re a small business owner, accountant, or bookkeeper, you can use Dext to create a workflow that reduces repetitive data entry and keeps financial documents organized.
This guide explains how to use Dext step by step.
Step 1: Create Your Dext Account
Start by creating your Dext account and completing the initial setup.
Once your account is ready, you can access the main areas of the platform for managing:
Receipts
Invoices
Expenses
Suppliers
Documents
Users
Accounting connections
The exact features available depend on your Dext product and subscription.
Step 2: Connect Your Accounting Software
The next step is to connect Dext with your accounting software.
A typical workflow is:
Dext → Review → Publish → Accounting Software
Dext supports integrations with several accounting platforms, although availability can vary by region and product.
Connecting your accounting software allows processed documents to become part of your existing bookkeeping workflow.
Step 3: Choose How You Will Submit Documents
Dext provides different ways to capture financial documents.
Depending on your setup, you can submit documents through:
Dext mobile app
Email
Web upload
Drag and drop
Other supported submission methods
Choose the method that works best for your business.
Step 4: Capture a Receipt Using Your Phone
For employees and business owners, the mobile app is one of the easiest ways to capture receipts.
After making a business purchase:
Open Dext → Capture Receipt → Take Photo → Submit
Try to photograph the complete receipt clearly.
Avoid:
Blurry photos
Cut-off receipts
Very dark images
Reflections covering important information
A clear document makes data extraction easier.
Step 5: Upload an Existing Document
If your receipt or invoice is already stored on your computer, you can upload it through Dext.
The basic process is:
Open Dext → Upload → Select Document → Submit
This is useful for invoices received by email or documents already saved in your accounting folder.
Step 6: Forward Invoices by Email
If you regularly receive supplier invoices through email, you can use Dext’s supported email submission workflow.
For example:
Supplier sends invoice → Forward to Dext → Dext processes invoice
This reduces the need to manually download and re-upload every invoice.
Step 7: Let Dext Extract the Information
After you submit the document, Dext processes it and extracts available financial information.
Depending on the document, information may include:
Supplier
Date
Total
Tax
Currency
Invoice number
Line items
The purpose is to reduce manual typing and prepare the transaction for review.
Step 8: Check the Extracted Data
Don’t publish the document immediately.
Review the extracted information carefully.
Check:
Supplier
Date
Invoice number
Amount
Tax
Currency
Category
Compare the information with the original receipt or invoice.
If something is incorrect, edit it before continuing.
Step 9: Categorize the Expense
Choose the appropriate accounting category.
Examples include:
Office supplies
Advertising
Travel
Software
Meals
Professional services
The available categories depend on your accounting setup.
Correct categorization helps maintain accurate financial records.
Step 10: Review Tax Information
Check the tax information before publishing.
For example:
Subtotal → Tax → Total
Make sure the amounts match the original document.
This is especially important when processing invoices containing multiple tax rates or international transactions.
Step 11: Check the Supplier
Verify that the correct supplier is selected.
For example:
Supplier: Adobe
Category: Software
Amount: $100
Tax: Applicable tax
Correct supplier information helps maintain clean accounting records.
Step 12: Add Additional Information
If necessary, add notes or other relevant information.
For example:
Client meeting expense — Project ABC.
This can help accountants and finance teams understand unusual or project-specific transactions.
Step 13: Publish the Transaction
Once everything has been reviewed, publish the document to your connected accounting software.
The workflow becomes:
Document → Dext → Data Extraction → Review → Publish
After publishing, the transaction can continue through your normal accounting process.
Step 14: Verify the Transaction
After publishing, check your accounting software.
Verify:
Supplier
Amount
Tax
Category
Date
Supporting document
This final check helps identify mistakes before financial records are finalized.
Step 15: Use Dext for Employee Expenses
Dext can also help businesses manage employee receipts.
A simple workflow is:
Employee makes purchase
↓
Employee captures receipt
↓
Receipt submitted to Dext
↓
Finance team reviews
↓
Transaction published
This can reduce the number of paper receipts employees need to keep.
Step 16: Create a Consistent Team Workflow
If several employees submit receipts, establish clear rules.
For example:
Employees
Capture and submit receipts immediately.
Finance Team
Review documents and extracted information.
Accountant
Check accounting treatment where required.
Accounting Software
Store the final transaction.
A clear workflow helps prevent missing or duplicate documents.
Step 17: Process Invoices
Dext can also be used for supplier invoices.
A basic invoice workflow is:
Invoice Received
↓
Submit to Dext
↓
Data Extracted
↓
Supplier Verified
↓
Amount & Tax Checked
↓
Approval
↓
Publish
This can help reduce manual invoice entry.
Step 18: Use Automation Carefully
Dext can automate parts of the bookkeeping workflow, but automation should be configured carefully.
For recurring transactions, businesses can use consistent supplier and categorization rules where supported.
Always review automation results periodically to make sure transactions are being handled correctly.
Step 19: Keep Documents Organized
Create a consistent process for financial documents.
Avoid keeping receipts scattered across:
Personal phones
Email inboxes
Paper folders
Desktop folders
Messaging apps
Instead, establish Dext as a central document-capture point for your bookkeeping workflow.
Step 20: Review Your Workflow Regularly
After using Dext for several weeks, review your process.
Ask:
Are receipts being captured quickly?
Are documents being categorized correctly?
Are duplicate documents appearing?
Are employees following the process?
Are accounting integrations working correctly?
Are there repetitive tasks that could be automated?
Use these observations to improve your bookkeeping workflow.
Example Dext Workflow
Here’s a complete example for a small business:
Employee buys office supplies
↓
Receipt photographed in Dext
↓
Dext extracts supplier, date, amount, and tax
↓
Finance team reviews information
↓
Office Supplies category selected
↓
Document approved
↓
Published to accounting software
↓
Receipt stored with transaction
Best Practices
Capture Receipts Immediately
Take a photo immediately after making a business purchase.
Use Clear Images
Make sure the complete document is visible.
Review Automated Data
Don’t assume every extracted field is correct.
Use Consistent Categories
Keep accounting categories organized.
Train Employees
Show employees exactly how and when to submit receipts.
Check Integrations
Regularly verify that transactions are being transferred correctly.
Keep Human Oversight
Automation should reduce repetitive work, not remove financial review completely.
Common Mistakes to Avoid
Uploading unreadable receipts.
Forgetting to submit receipts.
Publishing without reviewing data.
Selecting the wrong category.
Entering duplicate transactions.
Ignoring tax information.
Not checking supplier details.
Giving employees unclear instructions.
Assuming automated extraction is always perfect.
Frequently Asked Questions
How do I use Dext for receipts?
Capture or upload a receipt, allow Dext to extract the information, review the extracted data, categorize the transaction, and publish it to your connected accounting software.
How do I use Dext for invoices?
Submit the invoice through the mobile app, email, or web upload, review the extracted information, verify the supplier and accounting details, and publish the transaction.
Can employees use Dext?
Yes. Employees can capture and submit business receipts, allowing finance teams or accountants to review them.
Does Dext automatically extract receipt information?
Yes. Dext is designed to extract relevant information from submitted financial documents, reducing manual data entry.
Should I review Dext transactions?
Yes. Financial information should be reviewed before publishing, particularly when the document contains unusual amounts, tax treatment, or multiple line items.
Final Verdict
Dext is most useful when you want to create a simple and repeatable process for handling financial documents.
The basic workflow is:
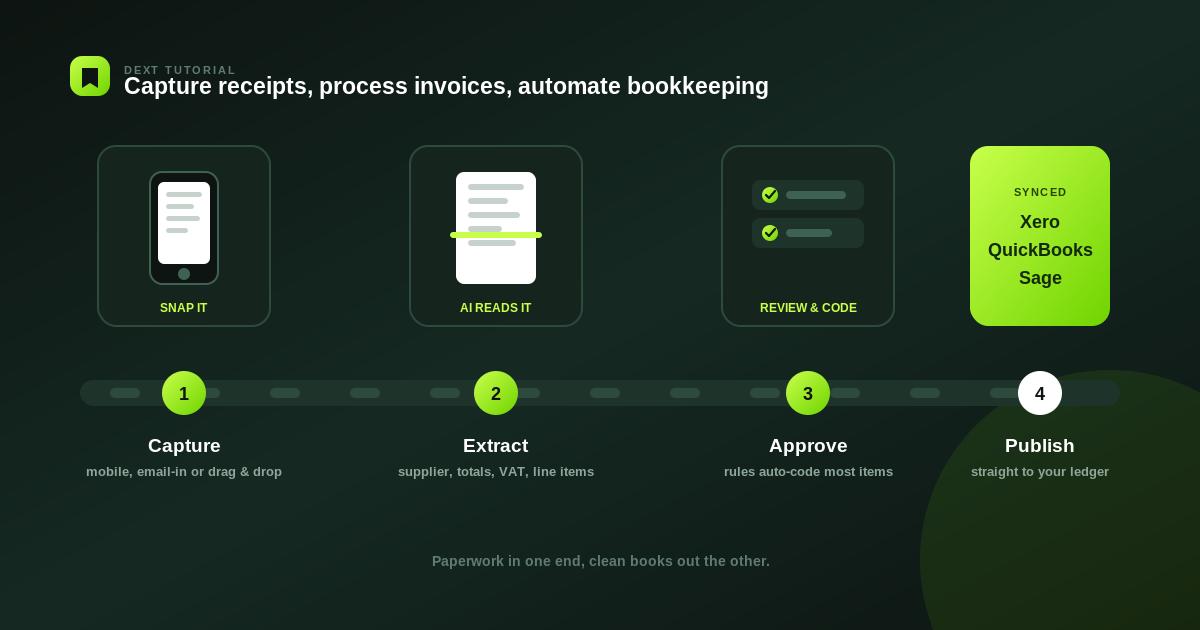
Capture → Extract → Review → Categorize → Publish
For small businesses, this can make everyday receipt management easier. For accountants and bookkeepers, it can reduce repetitive document-processing work across multiple clients.
The key to getting the most from Dext is to combine automation with human review. Capture documents quickly, check extracted information carefully, and only then publish transactions to your accounting system.